
12
Jan
Installer AutoCAD 2019 Mac & PC
Install AutoCAD 2019
This is a guide on how to install AutoCAD 2017 .
If you have not registered for an AutoDesk account yet, read this simple guide on how to register for an account first before proceeding.
Step 1: Go onto the AUTODESK website
Access the Autodesk website. This can be done multiple ways, including entering http://www.autodesk.ca/en . It is recommended that you use the Mozilla Firefox browser as it has a higher success rate than other browsers. This is not mandatory however.

Step 2: Students and Educators
Click the MENU pull down in the top right of the screen and select “STUDENTS AND EDUCATORS”

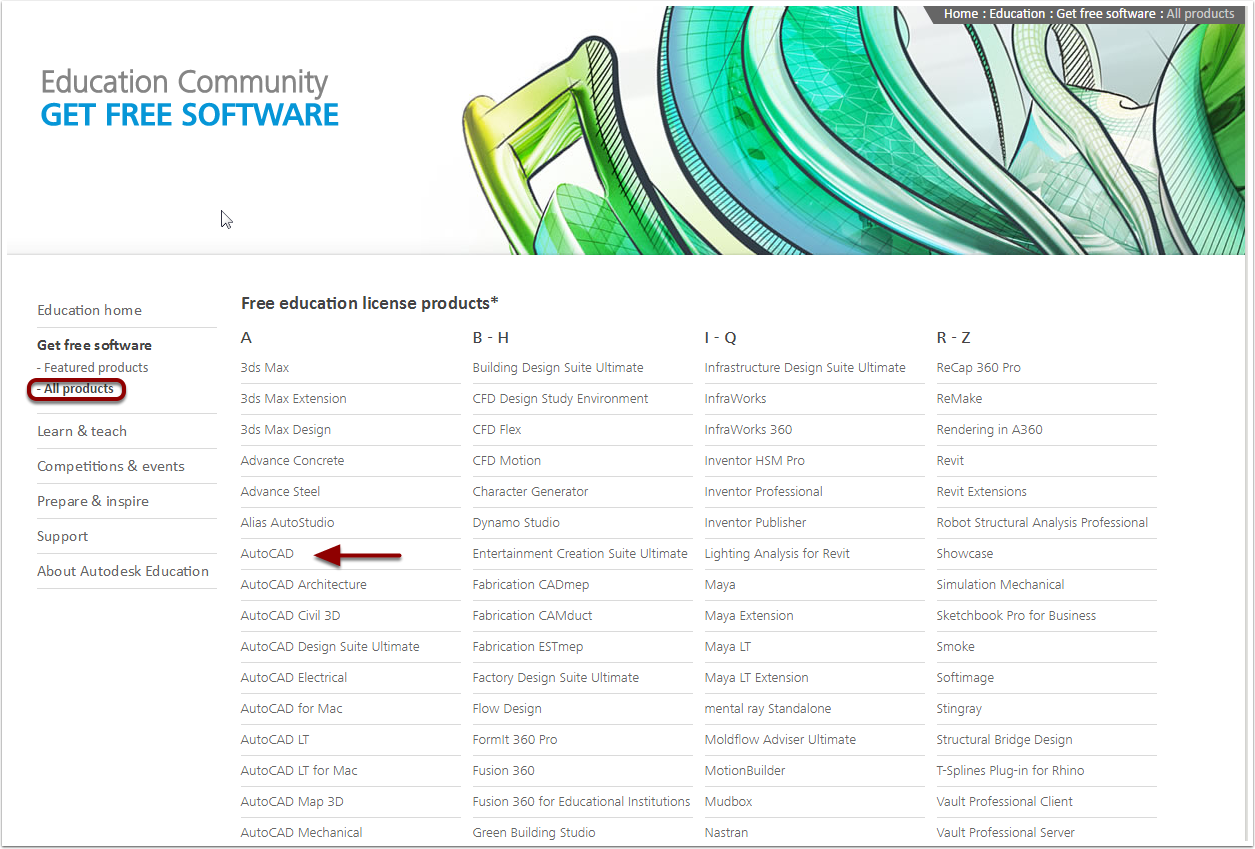
Step 3: Access free software
Click “Get free software” on the left side of the screen then access “All products”. Search through the provided list for the required software (ex AutoCAD).
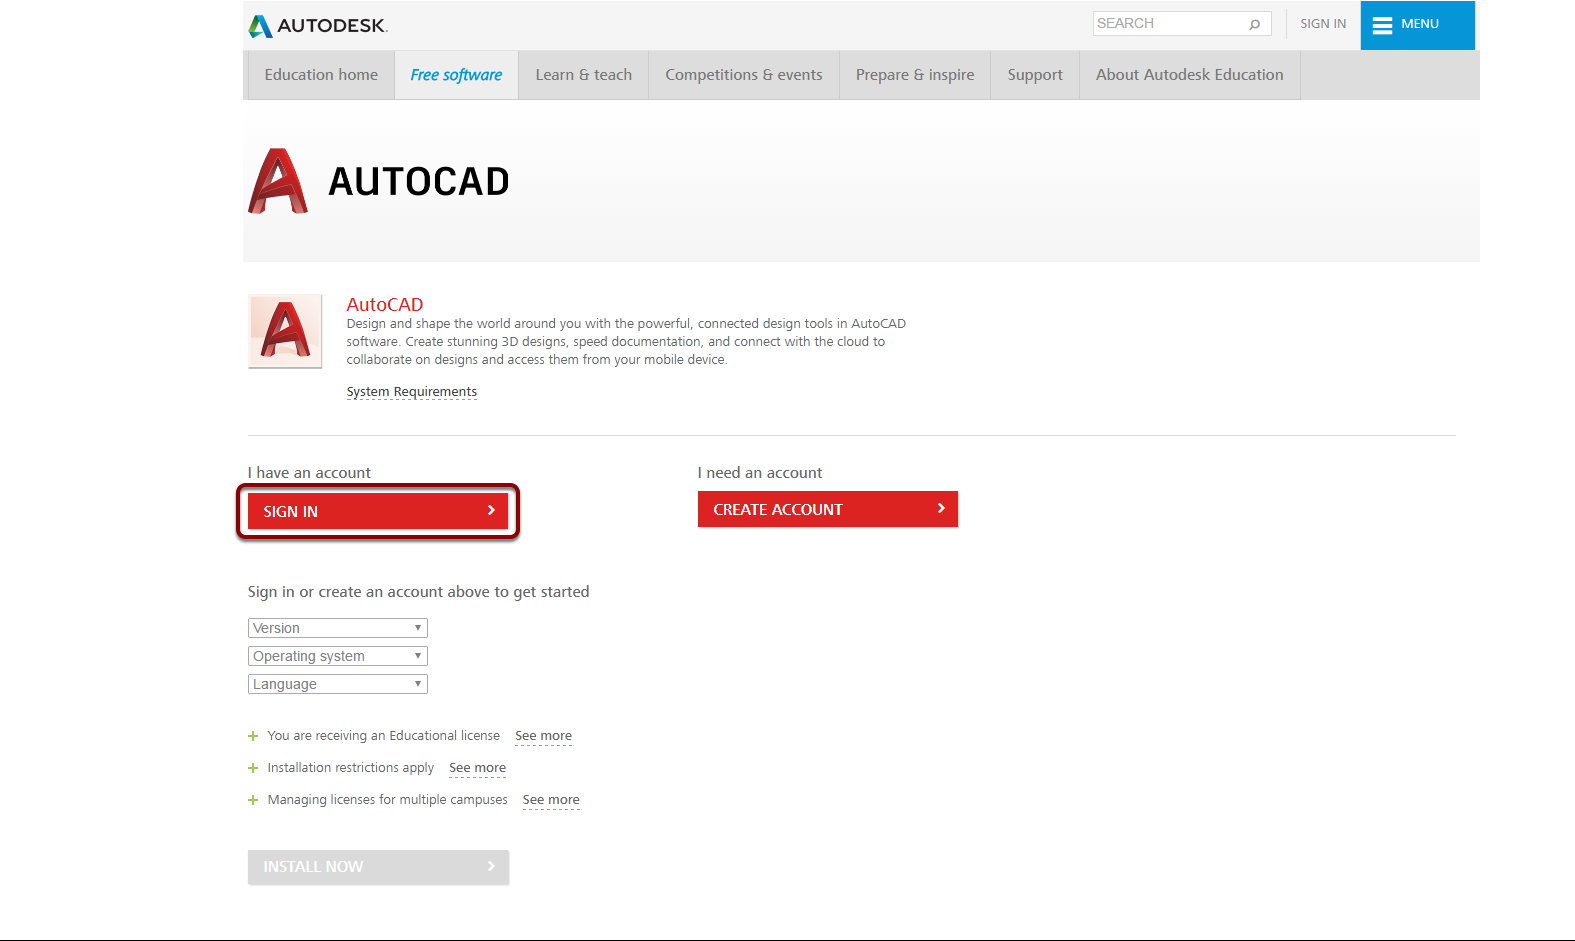
Step 4: Sign in to your Autodesk account
Click on SIGN IN and you will be prompted your Autodesk Login information. After signing in, you will be able to select the version of AutoCAD you want to download and install.
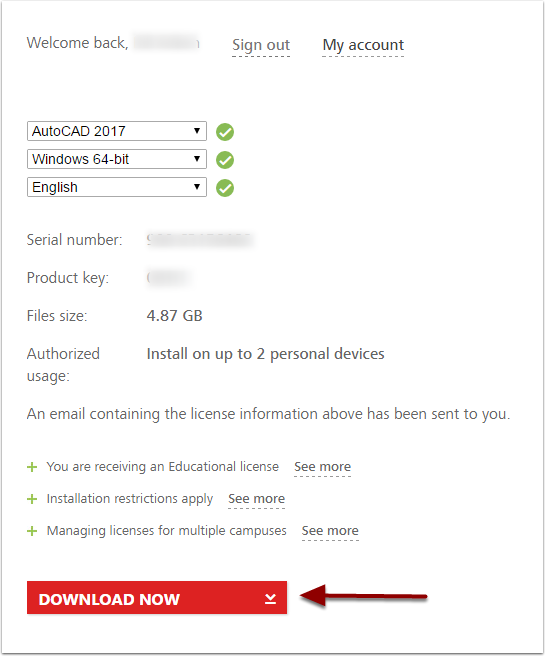
Step 5: Downloading AutoCAD
Once you are signed in select the proper program, bit, and language (in this case AutoCAD 2017, Windows 64-bit and English). You may want to note the serial number and product key as you will need these to authenticate the download.
Note: Most student versions use the same serial number and product key.
Now select DOWNLOAD NOW. You may be presented with a security warning from the download. If this happens, click “Run” or “Ok” (whichever continues the download process) as Autodesk products are relatively secure.
Note: For downloads, it can sometimes be prudent to bring down your firewall or any additional security as they can impede the download speeds or pop-ups. Just be sure to return the security measures once your downloads are complete.
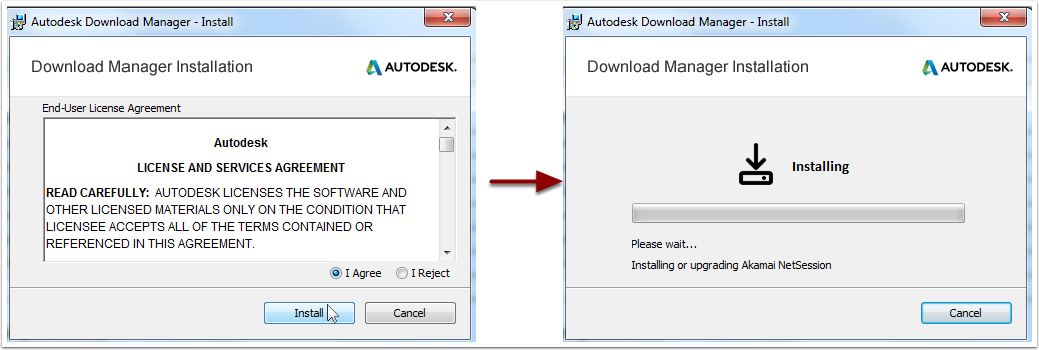
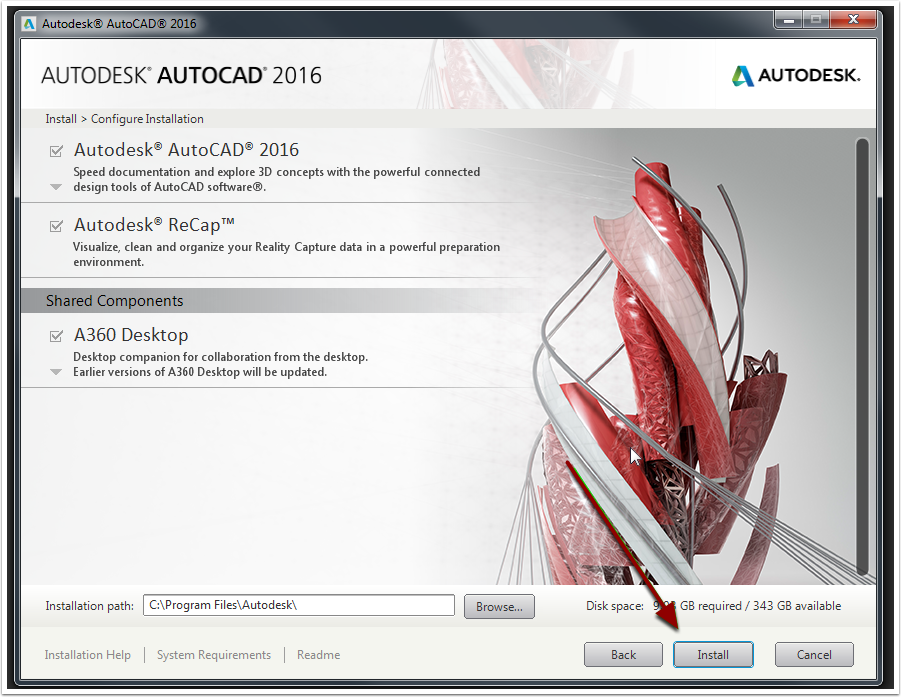
Step 6: License service agreement
You will be prompted to read the “LICENSE AND SERVICES AGREEMENT”. Read through it and click “I Agree” then “Install”. The Download Manager will pop up. This may take some time.
Step 7: Autodesk Download Manager
Once the manager is installed, an “Autodesk Download Manager” will pop up. It should create its own save file. Make sure that all of your AutoCAD downloads go to the same place on your computer. The default file should be fine.
Click OK.
The Autodesk Download manager should begin loading. This may take some time.

Step 8: Downloading Software
Once the Download Manager is finished, the Autodesk download should pop up. Click install on both “Tools and Utilities” on the left and finally the software itself on the right.
Both of these may take a considerable amount of time. Be patient.
Step 9: The program should now be ready to use
You should receive a page with green check marks across the left side, listing off the different features of the product. There should also be an application by default added to your home screen. If the application is not on your home screen you may look through your applications with the START button search in the bottom left of your screen (for windows) or by using the Finder (for Macs).
Upon first entering the program, you will most likely be prompted to enter your product key. The key was presented on step 5. You will be unable to use the product if you do not enter the product key. If you cannot remember the key or were never presented with it, please try Steps 10 – 12.
If you cannot find your desired application, don’t panic. Try restarting your computer.
If all of this worked: CONGRATULATIONS!
If you require technical assistance with the installation, please contact the Techbar

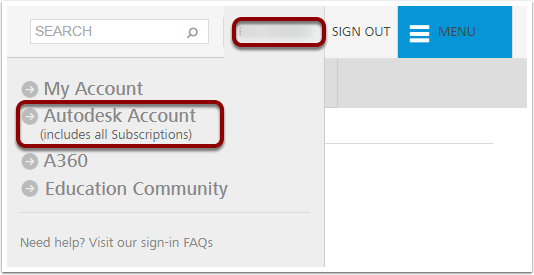
Step 10: Finding the Product Key After Having Downloaded the Software (Part 1 of 3)
In the event that you have forgotten a product key, don’t panic. Sign into Autodesk and click on your name, then click “Autodesk Account”.
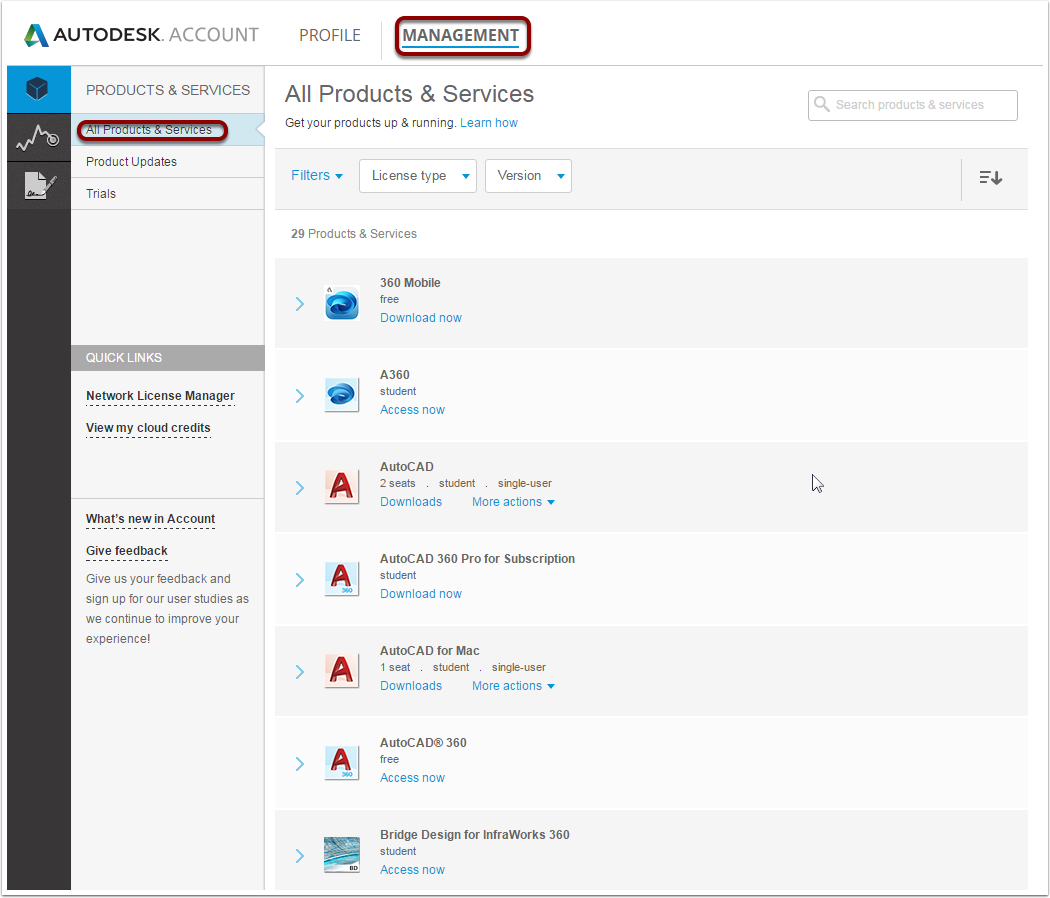
Step 11: Finding the Product Key After Having Downloaded the Software (Part 2 of 3)
Click on “MANAGEMENT”. This will present every product that you have downloaded and most programs that are available.
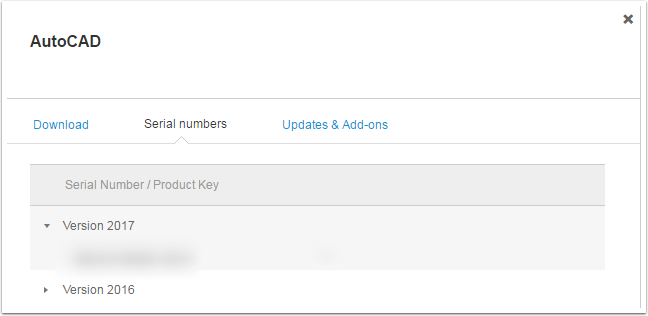
Step 12: Finding the Product Key After Having Downloaded the Software (Part 3 of 3)
Click on the “More actions” pull down then click “Serial numbers”. This will present the serial numbers and the product keys of all of the applications which you have downloaded. Take this information to activate your Autodesk product.
Topics


